You cannot close this panel but you can hide it by clicking its push-pin.
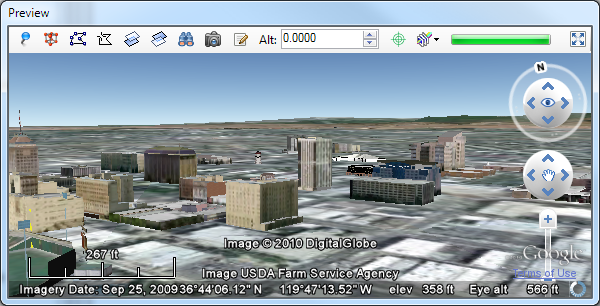
If you have a sophisticated mouse and the proper mouse drivers installed, you can tilt and rotate the earth using the scroll wheel by pressing on it and moving the mouse up and down and right to left. You can also zoom in and out by scrolling the wheel.
 |
Creates a new Placemark in the center of the earth. You can drag the newly added Placemark to reposition it. Placemarks can be dragged around any time even when it is not the currently selected feature. |
 |
Creates a new Model
in the center of the earth. Once created you must provide the Model path
to use. If Edit ( |
 |
Creates a new Path by clicking anywhere on the earth. Each click adds a new node. To end the Path creation click on the create new Path button again or press F6. |
 |
Creates a new Polygon by clicking anywhere on the earth. Each click adds a new node. To end the Polygon creation click on the create new Polygon button again or press F6. |
 |
Creates a new Ground Overlay. Once created you must provide the overlay image to use. |
 |
Creates a new Screen Overlay. Once created you must provide the overlay image to use. |
 |
Defines a 'Look At' that for the selected feature. The Look At element positions the "camera" in relation to the object that is being viewed. The Look At camera range of view is limited compared to the camera. |
 |
Defines the Camera that views the scene for the selected feature. When using the Camera on a feature, you can move the earth and look straight up or straight down. |
 |
Turns Edit on or off. When editing is 'on', the selected feature will display handles where, depending on the feature, it can be moved, resized, rotated as well as adding/removing nodes. Placemarks containing a single Point geometry can be dragged regardless of the state of the Edit. |
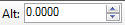 |
When adding some geometry in a feature, this Altitude value is used as the basis for the altitude of the added geometry. A good example of its use is when creating many polygons representing box shapes. Also note that when creating paths and polygons, you can add a node then change the Altitude before adding a new node, this way the newly added node will take the last altitude value. |
 |
Shows/hides a crosshairs. Can be useful when moving a feature such as a model or Placemark from one end of the earth to the other using the feature Snapshot. |
 |
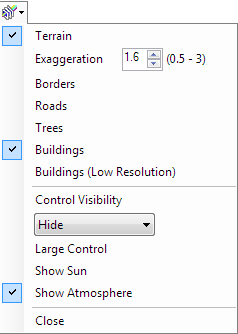
Shows the Layers, Controls, Sun and Atmosphere visibility. Click the Close item at the bottom of the menu to close it when done. |
 |
Indicates when the Earth Plug-in is busy. When all green, the earth plug-in is in idle state. |
 |
When undocked, Maximizes to the screen size or resizes to 1/2 the screen. |
Excerpt below is from Google Earth Site
http://earth.google.com/support/bin/static.py?page=guide.cs&guide=22370&topic=22652&answer=1067617 
Location of 3D trees
3D trees exist only in certain
locations in Google Earth. We have trees modeled for several areas around the
world, including San Francisco and Kenya. We plan to continue to add more 3D
trees to Google Earth over time.
Google has also worked to generate larger groups of trees and forests in non-urban areas. Here are a few forests that are available in Google Earth:
Accuracy of 3D trees
The goal of the 3D trees layer is to
represent what trees look like in a specific area. Google has developed its own
software to geo-locate and identify existing trees, from the tree species and
appearance to its size and location. However, in certain areas with a wide
variety of tree types, the biodiversity of tree species may not be 100%
accurate. Additionally, species of trees are more likely to be accurate in urban
areas than large forests, which have a large variety of tree
species.